 | ||
| ||
 |
 |
 |
 |
 |
 |
|
Puget Sound Knappers Display Case The purpose of this article is to explain how we went about building a large display case to hold a collection of points/blades of PSK members. The idea was initially conceived by PSK webmaster Jim Keffer as a way to showcase PSK member's art at the various events the Association participates in, in addition to the various displays that individual members bring. The idea was floated among a number of PSK members and the reception and encouragement was so positive that it had to be accomplished. So with the help of PSK member Woody Woodside (an appropriate nickname as Woody did most of the woodwork), we built it.
The Display Case Specifications: 1. Boxes - (2) 48" x 48" x 2" red oak frames with 1/8" oak plywood back. Frame has 1/8" rabbet to hold the back. Corners are miterer and reinforces with splines. 2. Lids - (2) 48" x 48" x 1" red oak. Corners are mitered, glued, pinned is bamboo dowels and reinforces with 1/2" brass angle braces 3. 'Acrylite acrylic - (2) 46-1/2" X 1/4" sheets (cut from a 4' x 8' sheet) 4. Lids are attached to boxes with 48" brass plated continuous hinges. Hook latches secure lid to box. 5. Boxes are attached with (3) steel 4" hinges 6. Finish - American walnut stain, 3 coats polyurethane 7. Interior - 1-1/4" x 46-1/4" x 46-1/4" high density Polyethylene foam, beige 'Polar Fleece' fabric. Fabric attached to foam with 3M brand General purpose spray adhesive. Foam attached to box with contact cement. (Note - a generous amount of spray adhesive is require for a good bond. And the more spray adhesive the firmer the foam gets - will help prevent sagging under the weight of a lot of points). There is a gap of 3/4" between the foam and acrylic to prevent the points from stratching the acrylic. For transporting there is a sheet of carboard between the points and acrylic. There will be a specialcardboard-linde box for the case for transporting it to various events.
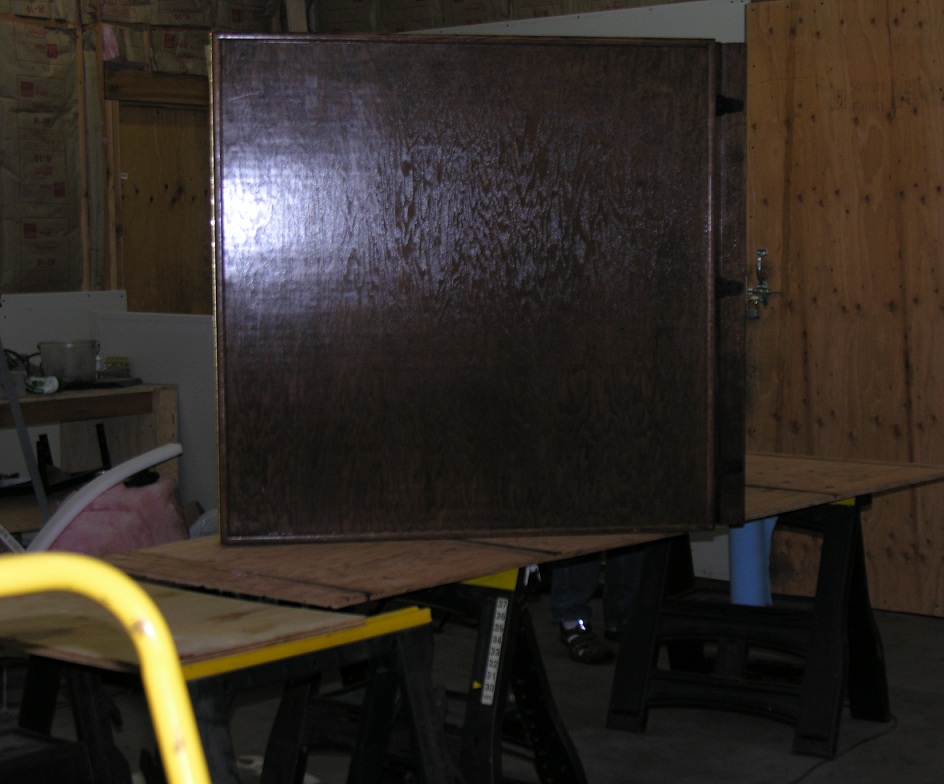
Front View with Woody Woodside - PSK Flintknapper and Master Woodworker! Back Side (poor lighting)
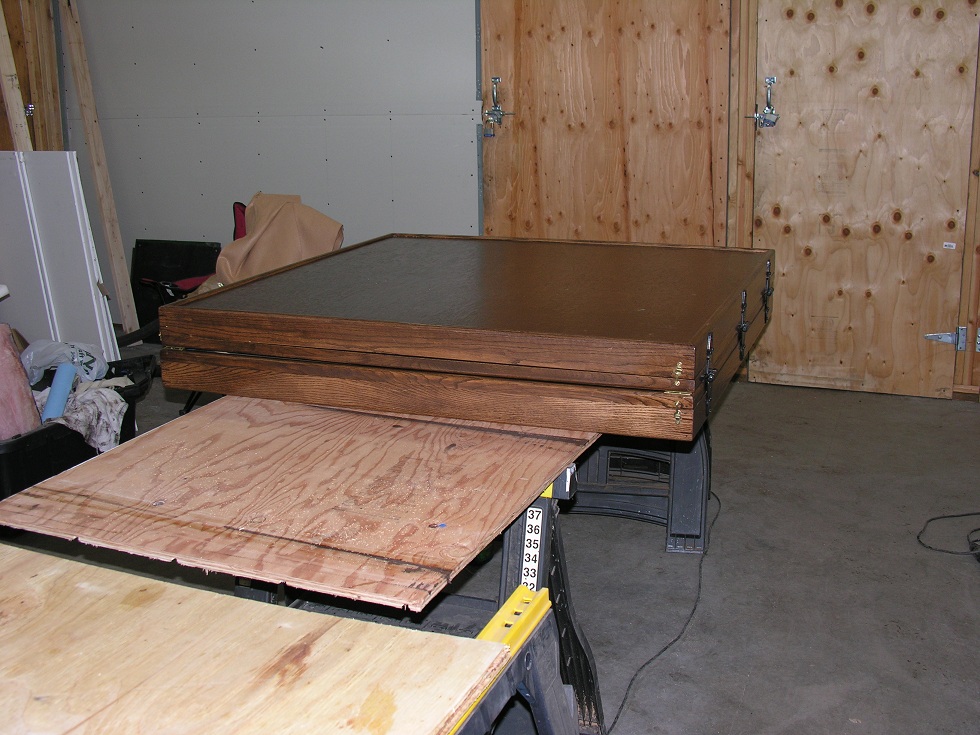
Case Closed - for transporting/storing
Attaching Points and Blades The most challenging part of this project was figuring our how to attach the points and blades - particularly since the vision was to have the case stand upright. After much trial and error we finally found a great solution - Velcro and Goop! While the original idea was to glue Velcro(hook side) to one side of the point/blade and glue the opposite piece of Velcor (loop side) to the fabric most glues we tried did not do both. Velcro glue worked to adhere the Velcro to the point but did not work on the fabric. Super glue fair no better. But Household GOOP - works on both! A very interesting and valuable discovery durin the glue testing process was that the hook side of the Velcro would attach direcly to the fabric we used - almost as well as the loop Velcro itself. As we receive points we will forgo gluing the loop side to the fabric and just let the point Velcro attach to the fabric. It will make it easier to position/re-position the points until we determine their permanent position at which time we will glue (goop) the loop Velcro to the fabric. (Special Note - the Velcro used is high quality - a 1" square piece will hold several pounds horizontally and even more vertically)
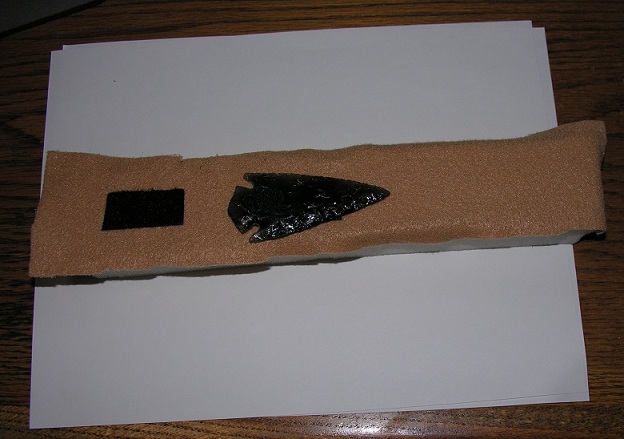
Here are some quick photos of the point attachment method during the final test: Photo 1 - Obsidian Point 3-1/4" x 1" x 3/16" 1” x 1” x 9” foam with fabric attached with 3M General Purpose Spray Adhesive. The point is Rainbow obsidian 1-1/2” x 3-1/4” by 3/8” Hook piece fof Velcro 'Gooped' to back of point - Velcro hooked directly to fabric (note the 'loop' Velcro on left, glued (gooped) to fabric). Flat on desk
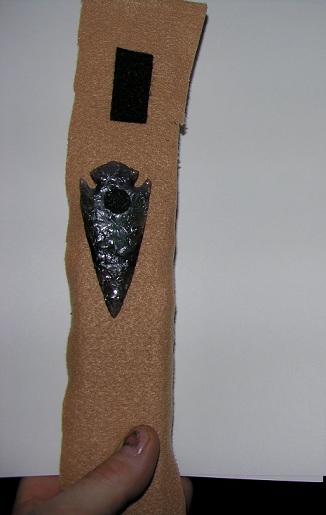
Photo 2 Test piece held vertically - point attached directly to fabric (no loop Velcro on fabric underneath point) (Velcro dot in center will be actual size needed to mount similiar size points)
Photo 3 Test piece held horizontally - point attached directly to fabric (no loop Velcro on fabric underneath point)
|
|
©2010 J Keffer |